
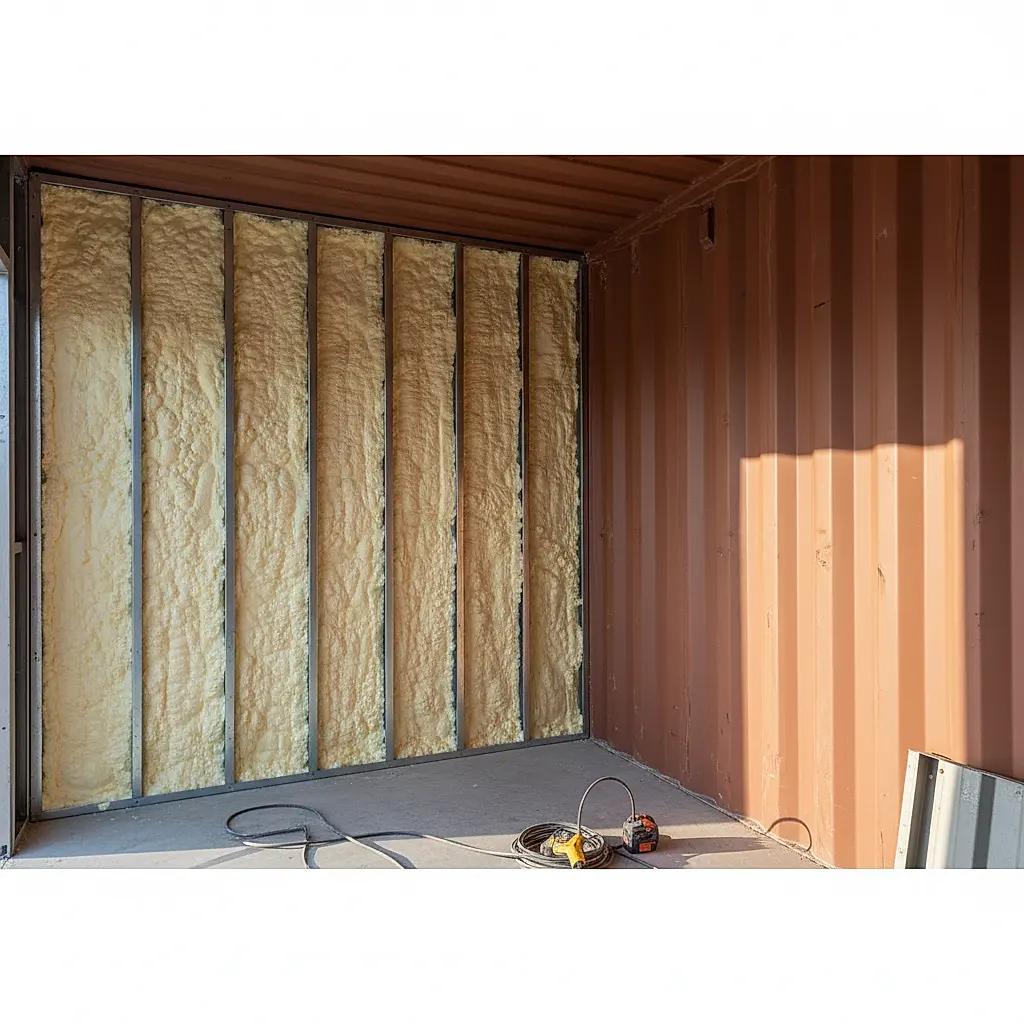
Learn how to prevent condensation in a shipping container home by understanding moisture sources, insulation, ventilation, and vapor control. Practical, no-hype guidance for container owners.
Why Condensation Happens in Shipping Container Homes
Steel shipping containers are excellent structures, but their tight, non-breathing nature can create moisture problems when they are converted into living spaces. Condensation forms when warm, humid air meets a cold surface. In a container home, that cold surface is often the steel wall, ceiling, or floor. The result can be rust, mold, musty odors, and damage to insulation or finishes.
Understanding the cause is the first step. Moisture in a container home comes from several sources:
- Occupants: Breathing, cooking, showering, and drying clothes release water vapor into the air.
- Building materials: Concrete, lumber, and paint can release moisture as they cure or dry.
- Ground moisture: Damp soil or poor site drainage can push water vapor upward through the floor.
- Leaks and openings: Even small gaps around doors, windows, or penetrations let in humid outside air.
- Temperature swings: Day-night cycles and seasonal changes cause surfaces to warm and cool, creating condensation cycles.
The goal is not to make the container perfectly sealed. The goal is to manage moisture so it can escape or be controlled before it causes damage. This article explains the principles and decision points. It does not replace a site-specific evaluation by a qualified builder or moisture professional.
Core Strategies for Moisture Control
There is no single fix for condensation. Most successful container homes use a combination of approaches. Think of moisture control as a system: control the source, manage airflow, and separate warm humid air from cold steel.
1. Reduce Moisture at the Source
The cheapest and most effective step is to keep excess moisture out of the air in the first place.
- Use exhaust fans in kitchens and bathrooms. Run them during and after cooking or showering.
- Fix leaks promptly. Check roof seams, window frames, and pipe penetrations.
- Avoid drying clothes indoors when possible. If you must, use a vented dryer or a dehumidifier.
- Consider a dehumidifier for humid climates or during shoulder seasons. Choose a size appropriate for your space and empty it regularly.
- Store firewood, wet gear, and damp materials outside the living area.
2. Insulate to Keep Steel Surfaces Warm
Insulation slows the movement of heat. In a container home, insulation helps keep the steel from becoming a cold condensing surface. However, insulation must be installed correctly. If warm, moist air can reach the cold steel behind the insulation, condensation can form out of sight.
Common approaches include:
- Exterior insulation: Rigid foam boards installed on the outside of the container. This keeps the steel warmer and reduces thermal bridging.
- Interior insulation: Batt, spray foam, or rigid boards installed inside a framed wall. This requires a careful vapor control strategy.
- Closed-cell spray foam: Often used because it adheres directly to steel and can act as both insulation and a vapor retarder. It must be applied by a qualified professional.
- Insulated panels: Some builders use structural insulated panels or prefabricated wall systems.
Every approach has trade-offs. Exterior insulation can be more effective at keeping the steel warm, but it changes the exterior appearance and may require additional weatherproofing. Interior insulation is common but demands attention to vapor barriers and airtightness. Discuss your climate and design with your builder before choosing.
3. Control Vapor Movement
A vapor barrier or vapor retarder is a material that slows the movement of moisture through a wall or ceiling assembly. The correct placement depends on your climate. In general, vapor barriers are placed on the warm side of the insulation in cold climates. In hot, humid climates, the strategy may be different or may rely on a vapor-permeable assembly.
Key points to understand:
- Vapor barriers are not the same as air barriers. Air leaks can carry far more moisture than diffusion through materials.
- Airtightness matters. Seal gaps around electrical boxes, plumbing, and framing.
- Do not trap moisture. If a vapor barrier is placed on the wrong side, it can trap moisture inside the wall and cause rust or mold.
- Local climate matters. What works in a dry climate may fail in a humid one.
Because these details are climate-specific, confirm your assembly with a qualified designer or building scientist. The container listing and CSC plate will not tell you how to insulate for your climate.
4. Ventilate and Dehumidify
Ventilation replaces moist indoor air with drier outdoor air. In humid climates, ventilation alone may not be enough. A mechanical ventilation system with heat recovery or energy recovery can help, but it must be sized and installed correctly.
Options include:
- Bathroom and kitchen exhaust fans: Simple and effective for spot moisture.
- Continuous exhaust or supply ventilation: Provides steady air exchange.
- Heat recovery ventilators (HRVs) or energy recovery ventilators (ERVs): Exchange heat and moisture while bringing in fresh air.
- Dehumidifiers: Remove moisture from the air without relying on outdoor conditions.
- Air conditioning: Cools and dehumidifies, but oversized units can short-cycle and leave moisture behind.
A common mistake is to seal a container too tightly without planning for ventilation. Airtight construction is good, but it must be paired with controlled fresh air.
5. Use Anti-Condensation Coatings and Treatments
Anti-condensation coatings are sometimes used on the interior of steel containers. These coatings are designed to absorb and release moisture, or to reduce surface tension so droplets do not form. They can be helpful in certain situations, but they are not a substitute for insulation and ventilation.
Before applying any coating:
- Confirm compatibility with your intended insulation and finishes.
- Prepare the steel surface according to the manufacturer's instructions.
- Understand that coatings may need reapplication over time.
- Check whether the coating affects fire ratings or indoor air quality.
Ask the manufacturer for technical data sheets and safety information. Do not rely on general claims that a coating will solve all condensation problems.
Design and Construction Details That Matter
Condensation control is not just about products. It is also about how the container home is designed and built.
Thermal Bridging
Steel is an excellent conductor of heat. Framing members, bolts, and seams can create thermal bridges that make certain spots colder. These cold spots are often where condensation appears first. Thermal breaks, such as rigid insulation between steel and interior finishes, can reduce this effect.
Floor Systems
Container floors are often replaced or covered during conversion. The floor assembly can be a path for moisture from the ground. A vapor retarder under the floor, proper drainage, and insulation can help. If the container sits on a slab or piers, ensure water drains away from the structure.
Windows and Doors
Windows and doors are common leak points. Use proper flashing, sealants, and weatherstripping. Double- or triple-pane windows with thermally broken frames reduce condensation on the glass and frame. Even with good windows, interior humidity levels must be managed.
Roof and Ceiling
Roof penetrations, vents, and seams need careful sealing. In many container homes, a secondary roof or shade structure is added to reduce solar gain and protect the container roof. This can also help with condensation by keeping the ceiling warmer in winter and cooler in summer.
Site Drainage
Water around the foundation increases humidity under and around the container. Grading, gutters, and French drains can move water away. The site plan should address drainage before the container is placed.
Climate, Use, and Occupancy: Variables You Cannot Ignore
A container home in a dry, mild climate faces different moisture challenges than one in a hot, humid climate or a cold, snowy climate. Similarly, a weekend cabin with low occupancy behaves differently from a full-time residence with a family cooking and showering daily.
When planning, consider:
- Local climate: Average humidity, rainfall, temperature swings, and prevailing winds.
- Occupancy: How many people will use the space and how often.
- Activities: Cooking, showering, laundry, and hobbies that produce moisture.
- HVAC design: Equipment sizing, ductwork, and ventilation strategy.
- Monitoring: Hygrometers and moisture meters can help you track conditions and catch problems early.
There is no universal recipe. A qualified local builder or energy consultant can help you choose assemblies and equipment that suit your site and budget.
Common Mistakes to Avoid
- Sealing the container without ventilation. A tight container with no fresh air can become a moisture trap.
- Installing vapor barriers in the wrong location. This can trap moisture inside walls.
- Ignoring small leaks. Even minor water intrusion adds up over time.
- Oversizing air conditioning. Short run times may not remove enough humidity.
- Skipping a dehumidifier in humid climates. Natural ventilation may bring in more moisture than it removes.
- Assuming a coating is a complete solution. Coatings can help but do not replace insulation and ventilation.
- Neglecting site drainage. Groundwater and roof runoff can raise indoor humidity.
If you are unsure about any of these points, ask questions before you build. It is easier to plan for moisture control than to fix it later.
Frequently Asked Questions
Does every shipping container home need a dehumidifier?
Not necessarily. The need depends on your climate, occupancy, ventilation, and insulation. In humid climates or tightly sealed homes, a dehumidifier is often helpful. In dry climates, it may be unnecessary. Monitor indoor humidity with a hygrometer and adjust as needed.
Can I just spray foam the entire container interior?
Closed-cell spray foam is a common choice because it adheres to steel and can act as insulation and a vapor retarder. However, it must be installed by a qualified professional, and the assembly still needs a ventilation plan. Spray foam alone does not guarantee condensation control. Discuss the full wall and ceiling assembly with your builder.
Will a dehumidifier alone solve condensation on my container windows?
A dehumidifier can reduce indoor humidity and may lessen window condensation, but windows are often the coldest surface and may still condense in extreme cold. Improving window performance, adding ventilation, and managing indoor moisture sources are also important.
How do I know if I have a moisture problem?
Look for water droplets on windows or steel surfaces, musty odors, mold growth, rust spots, peeling paint, or warped flooring. A moisture meter can help you check walls and floors. If you find problems, address the source and consult a professional.
Are anti-condensation coatings worth it?
They can be useful in some situations, but they are not a cure-all. Their effectiveness depends on the product, application, and the rest of your moisture control strategy. Ask for technical data and consider how the coating fits with insulation, ventilation, and vapor control.
Next Steps for Your Container Home Project
Moisture control is a planning issue, not just a product purchase. Start by understanding your climate, your site, and how you will use the space. Then choose insulation, ventilation, and vapor control strategies that work together.
If you are still selecting a container, review the individual listing details and confirm availability, pricing, and condition with the Newport team. You can browse options at our shop. For questions about delivery, site access, or specific container features, contact us. We are happy to help you gather the information you need for a successful project.
Always confirm exact specifications, CSC plate details, and delivery requirements with the Newport team and your local authorities. A qualified builder or moisture professional can help you finalize a design that fits your climate and budget.
Plan the next step
Confirm the container and the delivery plan.
Browse current listings, then speak with the Newport team to verify the unit, total pricing, site access, and delivery requirements before payment.