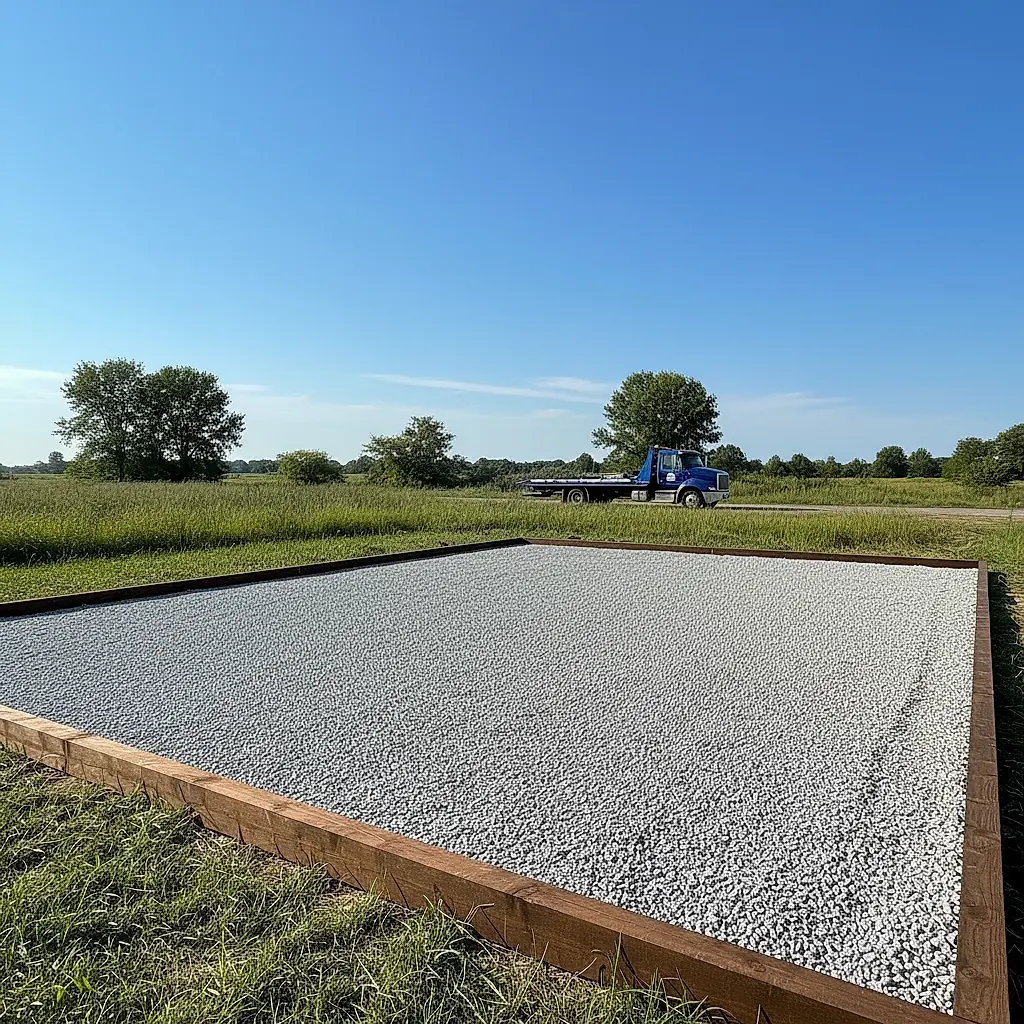
A gravel pad can give your shipping container a stable, well-drained base. This guide covers planning, materials, drainage, and questions to confirm with Newport before delivery.
A shipping container is only as stable as the ground beneath it. A properly planned gravel pad helps distribute weight, improve drainage, and reduce the chance of settling or moisture problems over time. This guide walks through the decisions involved in site prep so you can ask better questions and compare options before your container arrives.
Because every site is different, treat the dimensions, materials, and methods here as planning starting points. Confirm exact specifications for the container you are considering, and confirm site access and delivery requirements with the Newport team.
Why a Gravel Pad Is Often Considered for Container Placement
A gravel pad is a common approach because it can be built with widely available materials and adapted to many sites. It is not the only option, and it is not automatically the right one for every property. Soil type, slope, drainage patterns, frost depth, and local requirements all matter.
What a Gravel Pad Can Help With
- Load distribution: Gravel spreads the container's weight across a wider area than bare soil alone.
- Drainage: A crowned or graded pad can direct water away from the container's base.
- Level surface: A compacted, level pad reduces twisting and uneven contact points.
- Separation from soil: A gravel layer plus a separation fabric can limit mud and vegetation contact with the container floor structure.
What a Gravel Pad Does Not Solve
- It does not replace a geotechnical review on weak, filled, or organic soils.
- It does not guarantee a specific result if the subgrade is soft or poorly drained.
- It does not remove the need to check local rules for accessory structures, setbacks, or permits.
If you are unsure which base type fits your site, that is a normal decision point. Ask questions early rather than after the pad is built.
Planning the Pad: Size, Layout, and Access
Start With the Container Footprint
Shipping containers are commonly described by nominal length, such as 20 feet or 40 feet, and by nominal width of about 8 feet. Height is often described as standard or high cube. Exact external dimensions, corner casting locations, and door swing clearances vary by unit.
Use the individual listing and the container's CSC plate for exact specifications. Do not rely on nominal size alone when planning clearances.
Allow Working Space Around the Container
Even if the pad only needs to support the container, you will likely want room to walk around it, open doors, and inspect the base. Consider:
- Door end: Space for the doors to swing fully and for loading or unloading activity.
- Sides: Enough clearance for inspection, ventilation, and any future maintenance.
- Equipment: Space for whatever lifts or moves the container at your site. Confirm equipment needs with the Newport delivery team.
Check Site Access Before You Build
Delivery planning and pad planning should happen together. Access questions to confirm with Newport include:
- Approach width and turning room for the delivery vehicle.
- Overhead obstructions such as branches, wires, or structures.
- Ground conditions along the route, especially after rain.
- Whether the container will be placed directly on the pad or moved into position afterward.
Local authorities can confirm road restrictions or permits that may apply to your location.
Building the Base: Layers, Materials, and Drainage
A gravel pad is typically built in layers, with each layer serving a purpose. The right thickness and material depend on your soil and climate, so treat the following as a general framework rather than a prescription.
1. Prepare the Subgrade
Clear vegetation, roots, and soft topsoil from the pad area. The goal is to reach firm, stable ground. On soft or wet sites, this step may require more excavation or a different approach entirely.
2. Consider a Separation Fabric
A geotextile fabric is often placed between the subgrade and the gravel. Its purpose is to keep fine soil particles from migrating up into the gravel, which can help the gravel layer stay functional. Fabric type and placement should match your soil conditions.
3. Add and Compact Gravel in Lifts
Gravel is commonly placed in layers, sometimes called lifts, and compacted between lifts. Compaction helps create a firm, uniform surface. The best gravel blend, lift thickness, and compaction method depend on local material availability and your site.
4. Plan for Drainage
Water management is one of the most important parts of site prep. Options may include:
- Grading the pad so surface water flows away from the container.
- A slight crown or slope, depending on how the container will sit.
- Perimeter swales or drainage paths that move water away from the pad.
- Considering the seasonal high water table and how your site behaves in heavy rain.
Avoid trapping water against the container base. If your site holds water, discuss drainage with a local contractor or engineer before building.
5. Think About the Container's Contact Points
Containers are typically supported at their corner castings, but placement methods vary. Some owners place containers directly on a prepared pad; others use blocking, beams, or other supports. The right approach depends on the container, the pad, and how the space will be used.
Ask Newport about the recommended placement method for the specific unit you are considering, and confirm any foundation or anchoring requirements with a qualified local professional.
Common Site Prep Mistakes to Avoid
- Building the pad before checking delivery access. A perfect pad is not helpful if the delivery vehicle cannot reach it.
- Skipping drainage planning. Water is a leading cause of long-term problems around any structure.
- Using unstable fill. Organic material, debris, or soft fill can settle unevenly.
- Ignoring local rules. Setbacks, permits, and site restrictions vary by jurisdiction.
- Assuming one size fits all. Soil, slope, and climate change what works best.
If any of these apply to your site, pause and get local advice. It is usually cheaper to adjust a plan than to rebuild a pad.
Maintenance After Placement
A gravel pad is not maintenance-free, but it is manageable.
- Inspect the pad after heavy rain for pooling or erosion.
- Watch for settling or gaps at the container's support points.
- Keep the perimeter clear of debris that can block drainage.
- Re-level or add gravel if the surface develops ruts or low spots.
- Check the container base periodically for signs of moisture or corrosion.
Record what you observe so you can spot changes over time.
Frequently Asked Questions
How thick should a gravel pad be for a shipping container?
There is no single thickness that fits every site. The right depth depends on soil strength, drainage, frost conditions, and how the container will be supported. A local contractor or engineer can recommend a design for your specific ground conditions. Confirm placement recommendations for the container with the Newport team.
Do I need a permit for a gravel pad or container placement?
Permit rules vary widely by state, county, and municipality. Some locations regulate accessory structures, setbacks, or site work; others may not. Contact your local planning or building department to confirm what applies to your property. Do not assume a particular size or use is exempt.
Can I put a shipping container on gravel without a concrete foundation?
Many container placements use gravel or other prepared bases rather than concrete. Whether that is appropriate for your site depends on soil, drainage, load considerations, and local requirements. Discuss the options with a qualified local professional and confirm the recommended method for your container with Newport.
What kind of gravel works best?
Gravel selection depends on local availability and the design of your pad. Common approaches use crushed stone blends that compact and drain well. Ask a local supplier or contractor what they recommend for your soil and climate, and avoid materials that break down or hold water.
How do I know if my site drains well enough?
Look for standing water after rain, soft spots, or signs of seasonal saturation. If you are unsure, a local contractor or engineer can assess your site. Good drainage planning is easier before the pad is built than after.
Next Steps
Site prep is a series of decisions, not a single answer. Start by reviewing the containers available and noting the nominal size and height that fit your plan. Then confirm exact specifications, availability, and pricing for the unit you are considering.
- Browse current options on our shop page.
- Share your site details and delivery questions through our contact page.
Before delivery, confirm site access, pad readiness, and any placement requirements with the Newport team. If your site is unusual, get local professional advice first. A little planning now can save significant time and cost later.
Plan the next step
Confirm the container and the delivery plan.
Browse current listings, then speak with the Newport team to verify the unit, total pricing, site access, and delivery requirements before payment.